Configuring roles for AWS Glue
Configure roles for AWS Glue
- Access IAM service
- Click Policies.
- Click Create Policy.
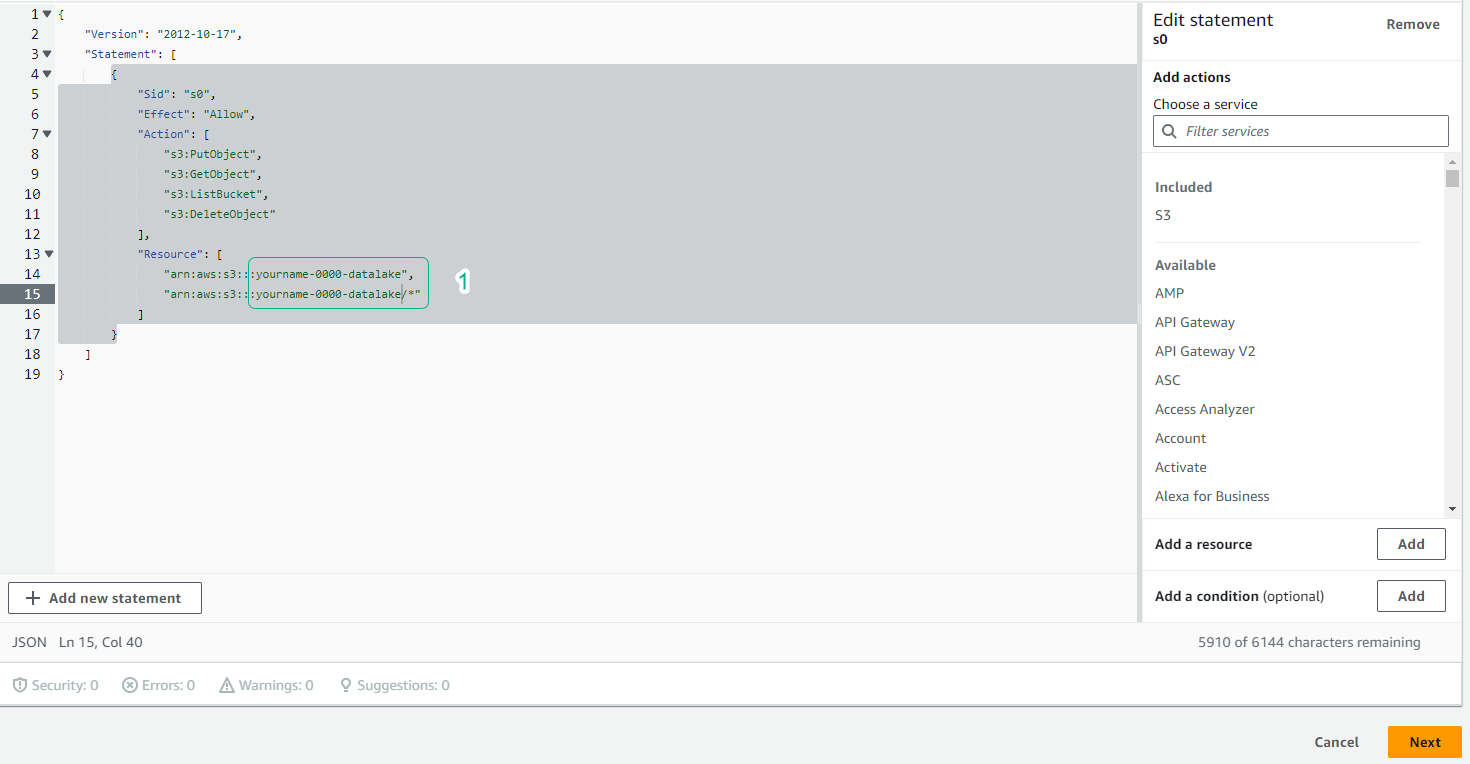
- Click the JSON tab, copy the policy content below.
- Edit YOUR-BUCKET-NAME to the name of the S3 bucket.
- Click Next: Tags.
{
  "Version": "2012-10-17",
  "Statement": [
    {
      "Sid": "s0",
      "Effect": "Allow",
      "Action": [
        "s3:PutObject",
        "s3:GetObject",
        "s3:ListBucket",
        "s3:DeleteObject"
      ],
      "Resource": [
        "arn:aws:s3:::YOUR-BUCKET-NAME",
        "arn:aws:s3:::YOUR-BUCKET-NAME/*"
      ]
    }
  ]
}
- Click Next: Review.
- In the Review policy section, set the Name policy as yourname-datalake-policy.
- Click Create policy.
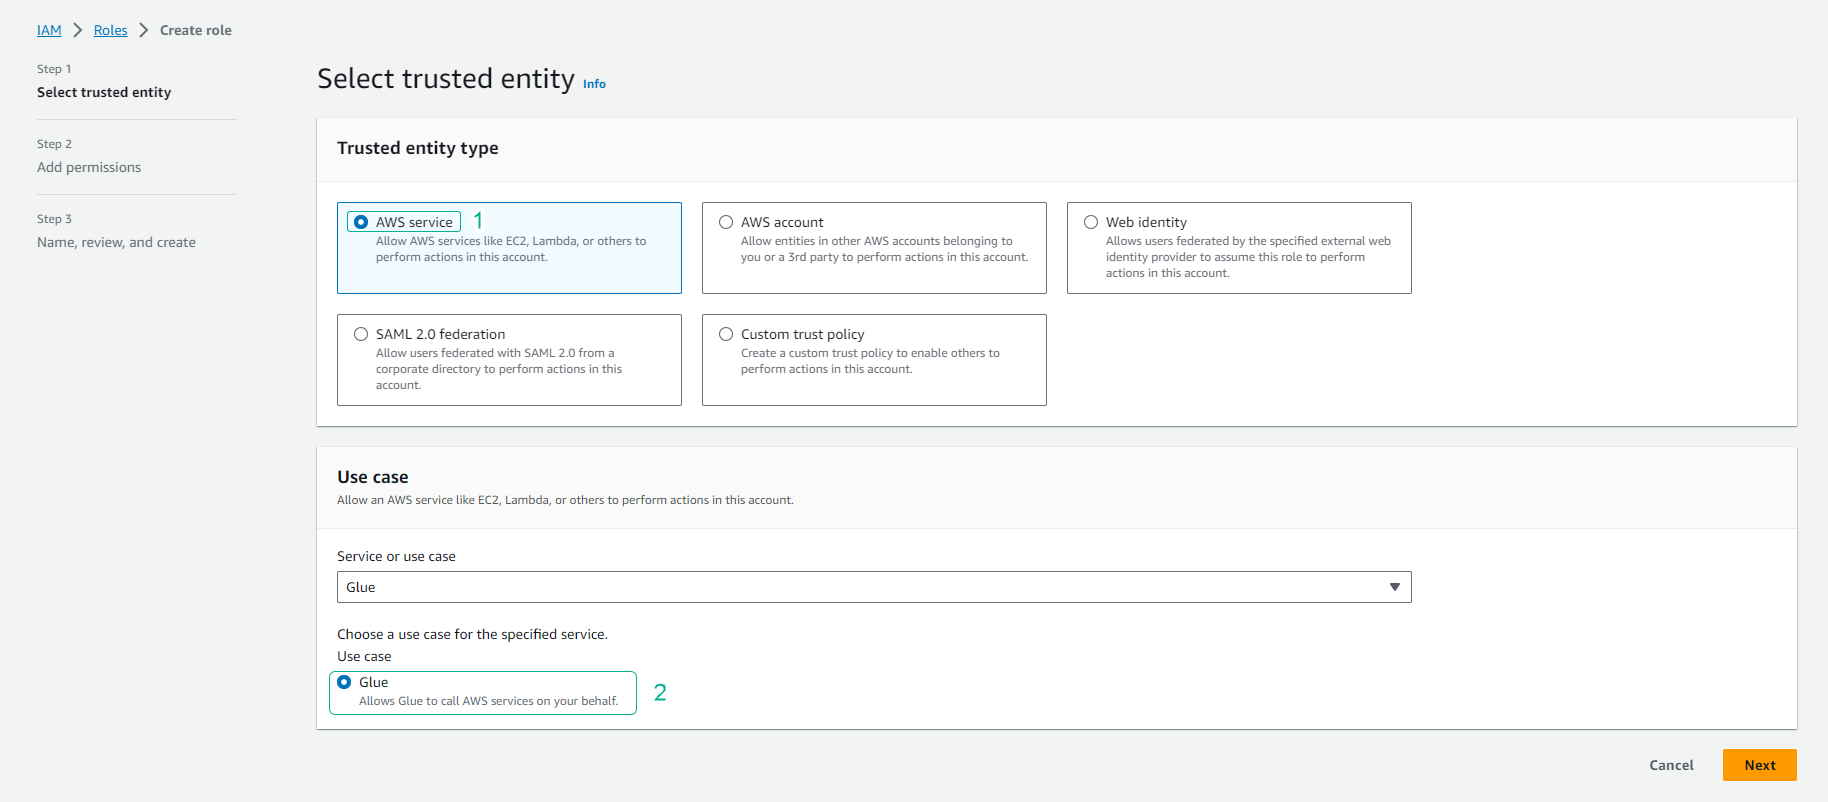
- Click Role, then click Create role.
- Click to select AWS service.
- Click to select Glue.
- Click Next: Permissions.
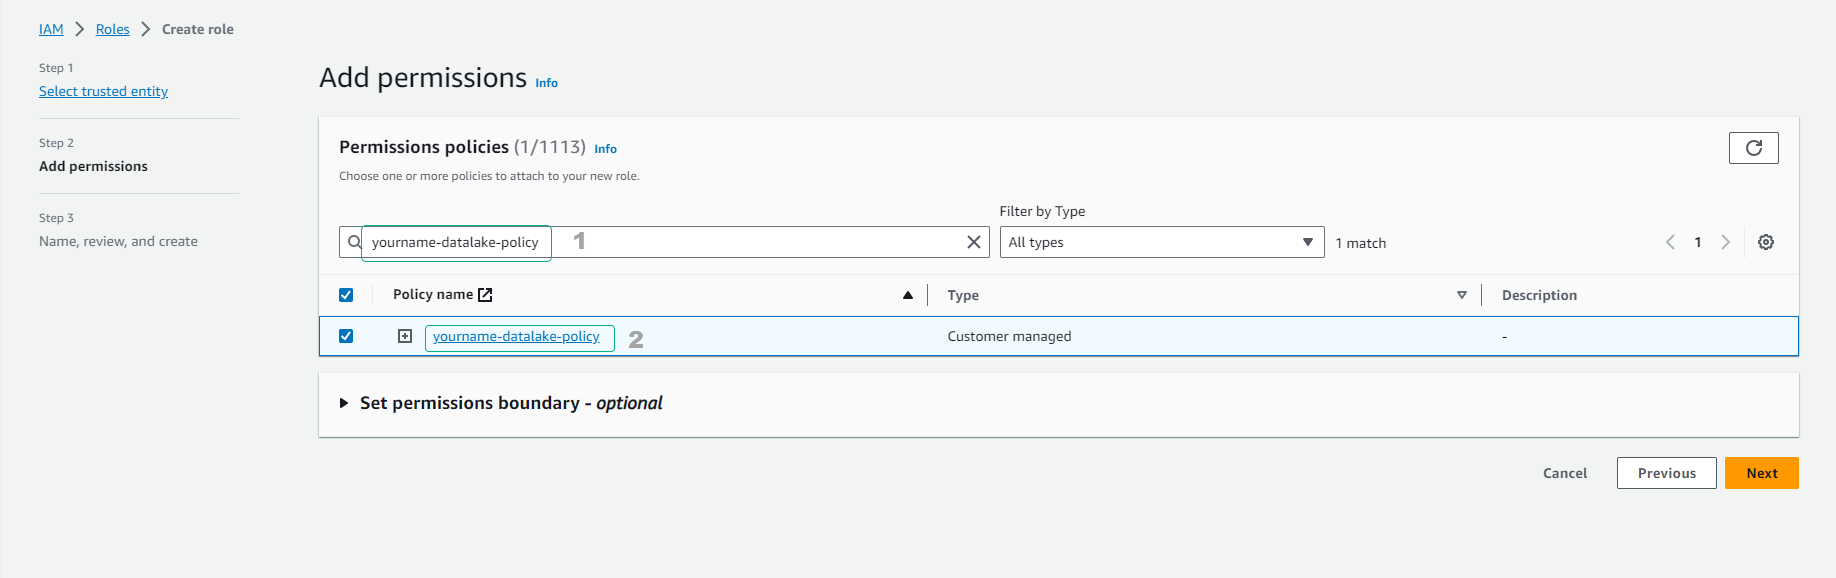
- In the Attach permissions policies section.
- Fill in datalake to search for policies.
- Click to select policy yourname-datalake-policy.
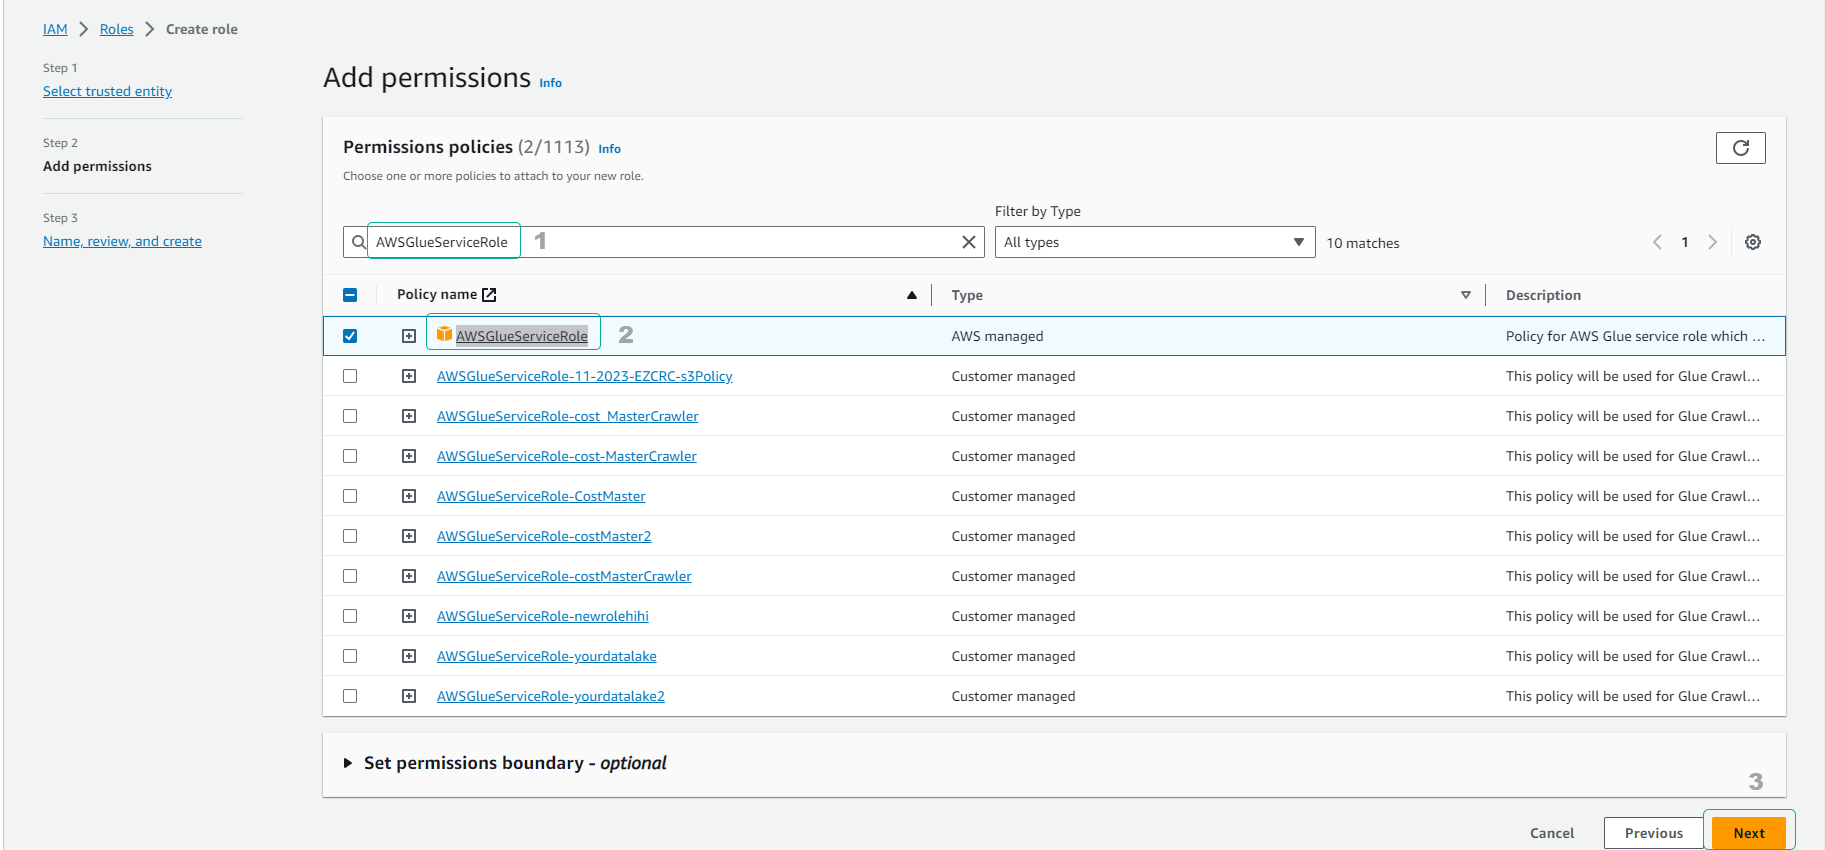
- Continue to Attach permissions policies section.
- Enter glueservice to search for policies.
- Click to select policy AWSGlueServiceRole.
- Click Next: Tags, then click Next: Review.
- Set the Role name as AWSGlueServiceRole-yourname-datalake.
- Click Create role.
In this step we have created a Role to grant permissions to the Glue Crawler process in the next step. In the next step we will create a Crawler job to explore the data and save metadata information to the Glue data catalog.